Do you also struggle to collect thoughts while beginning to write a research article?
Do you find yourself gazing at the blank sheet thinking about where to start?
Then Jenni AI writing tool is for you
Jenni AI is an AI-driven writing tool designed to help you create and refine high-quality articles and documents related to R&D, academia, marketing, etc. Here is the step-by-step guide for using it effectually:
First and foremost, like any other AI writing tool, Jenni AI also asks you to create an account (Choose a free version or paid version based on your need).
Open your web browser and visit the official website of Jenni AI
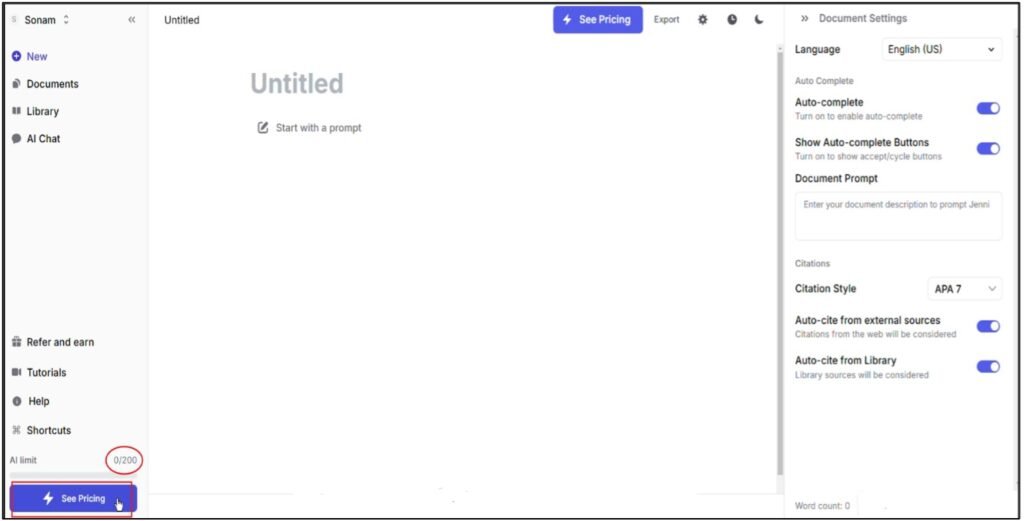
Go to JenniAI and sign up if you don’t have an existing account or sign in if you already have one.
As soon as you log in to your account you will enter Jenni AI’s dashboard. If you have signed in for free version, you will get a limited AI word count (200 words) for a day and limited access to Jenni AI features.
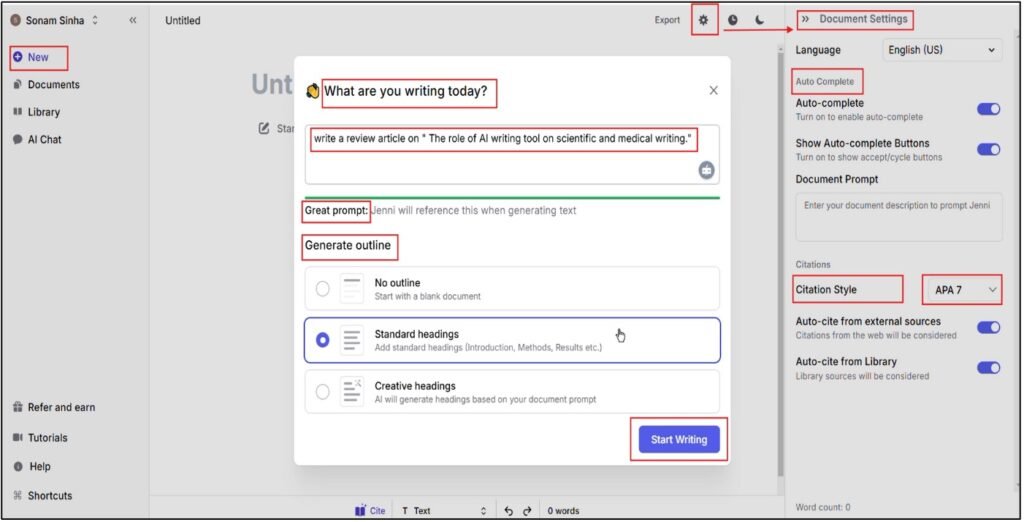
Click on New document or + New icon to open a new document. Jenni AI tool will ask you “what are you writing today”. You have to write a strong prompt to direct Jenni for the required actions. For instance, you may ask Jenni to “write a review article on the role of AI writing tool on scientific and medical writing”.
The tool will tell you whether your prompt is strong or weak. You can select option of Generate outline to generate standardized and creative headings or no headings at all.
Select your options and press Start Writing Icon to generate the article you requested.
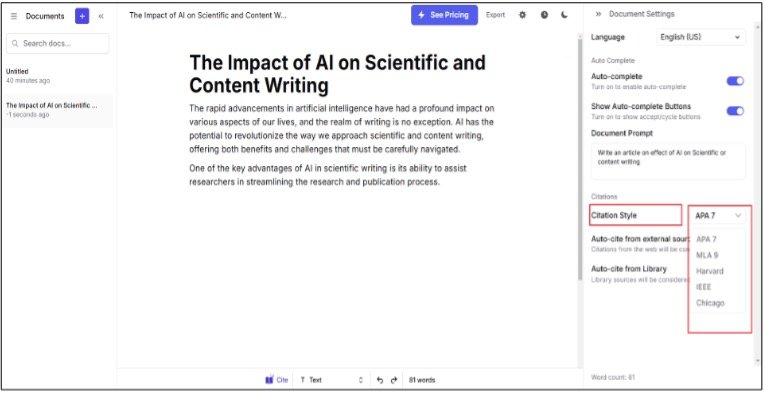
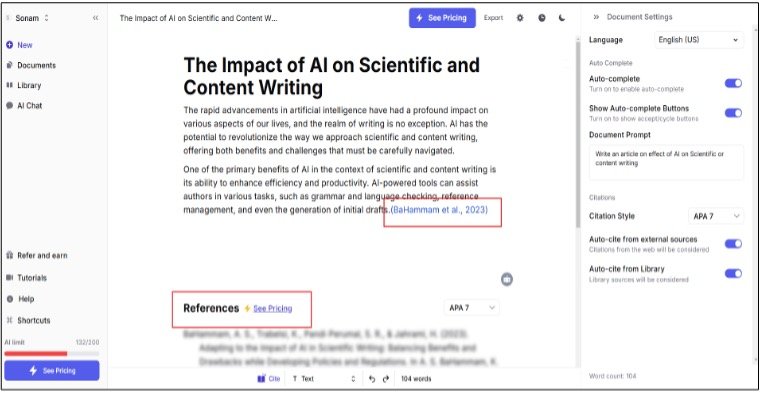
Go to Document Settings option in the right hand corner of the tool to adjust the tone of the content, citation style and many more parameter by selecting from the options.
Jenni gives the option of indicated citation styles from scroll down menu. You can choose from any one of the citation style and Jenni will cite references and add the bibliography accordingly.
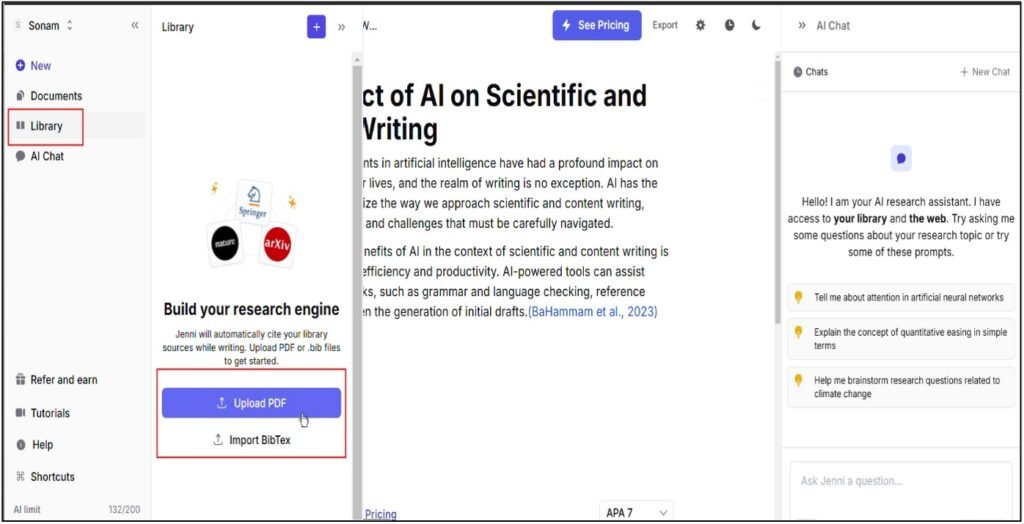
3. Set up your Library
You can upload research articles relevant to the topic and create library which would later be required for citing references.
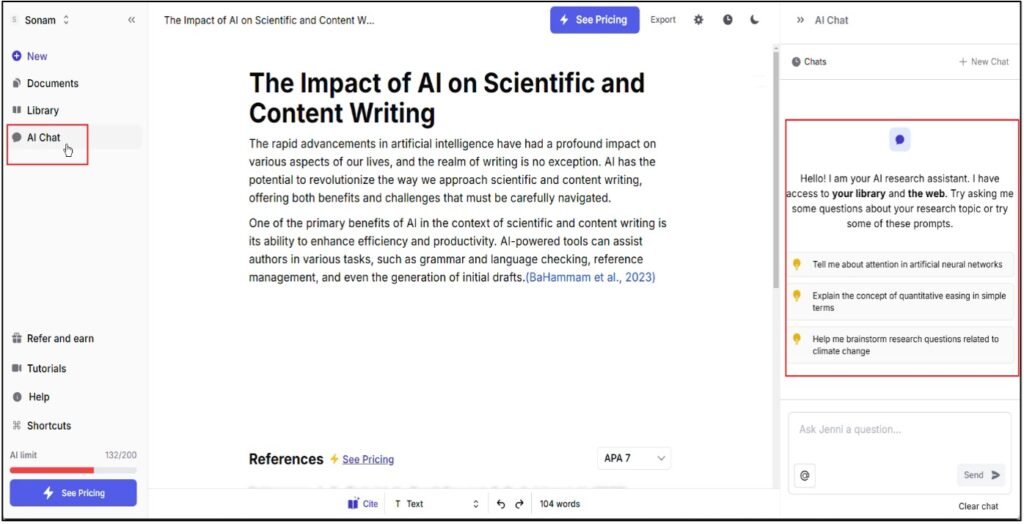
Once you have entered on what topic you want to write the article and you have updated your library. Go to AI chat feature of Jenni and chat with AI to refine your work by asking specific questions about this research topic. Ai have access to your library and web sources to help structure your article and refine your writing.
5. Provide Initial Input
Jenni start writing straight away and asks you to Accept the generated sentence, Try again writing (generates a different sentence with different context) or Shift plus to cycle to next auto completion. Once accepted, it further generates sentences and auto cite references from external sources or from library (as instructed from document settings)
You can also start writing by yourself in case you think AI needs to be guided towards a specific flow of content or an outline generation.
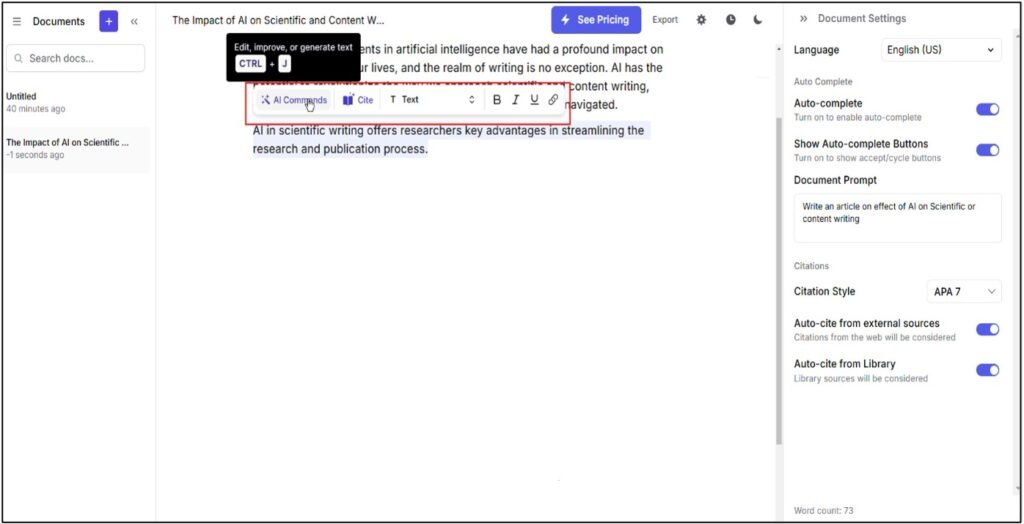
6. Use Jenni AI’s Tools
AI Commands: You can select the sentences generated from Jenni and click AI command option or press Ctrl +J from the popped-up tool bar. You will see a dropdown list of specific commands.
Choose from this list or you can command Jenni AI whatever you want AI to perform on the selected sentence. For instance:
Prompt Mode:
Type a specific instruction (e.g., “Write what AI offers to the researchers regarding Scientific writing”).
Let Jenni generate content based on your prompts.
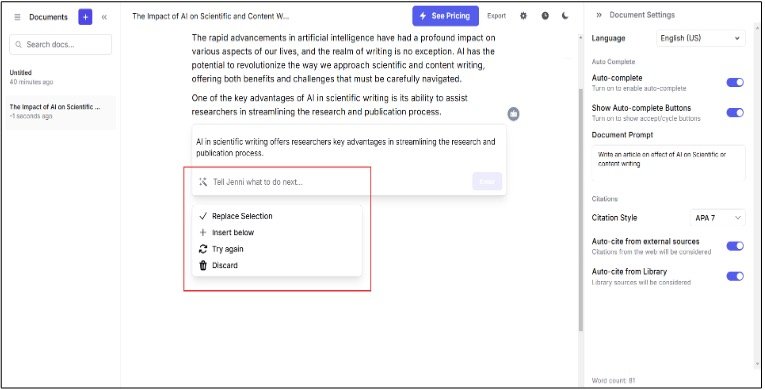
Command Features:
Use listed commands like “Summarize” or “Write opposing argument.”
AI will generate texts based on your given command in a different window within the document. Select the generated sentence/s and choose from the opened drop-down menu to Replace, Insert Below, Try again or Discard the sentence/s.
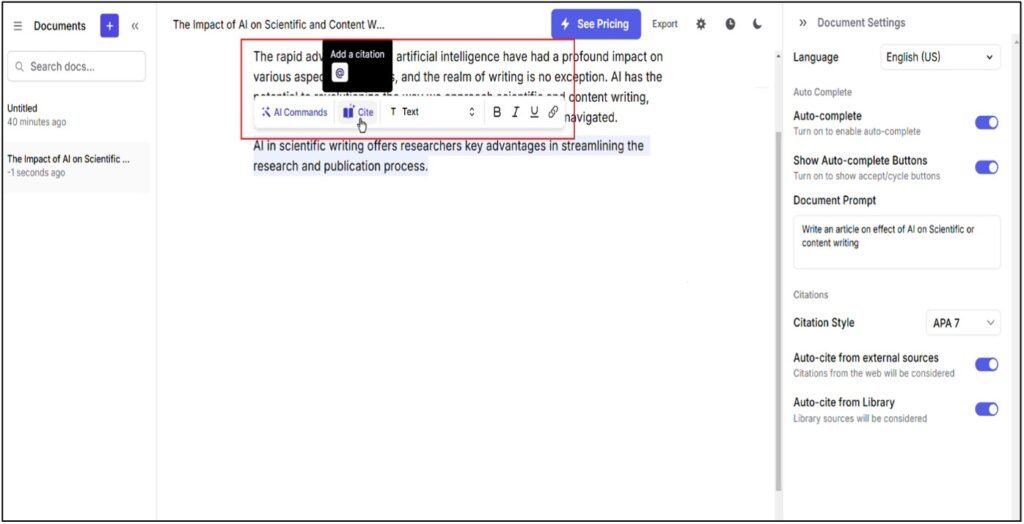
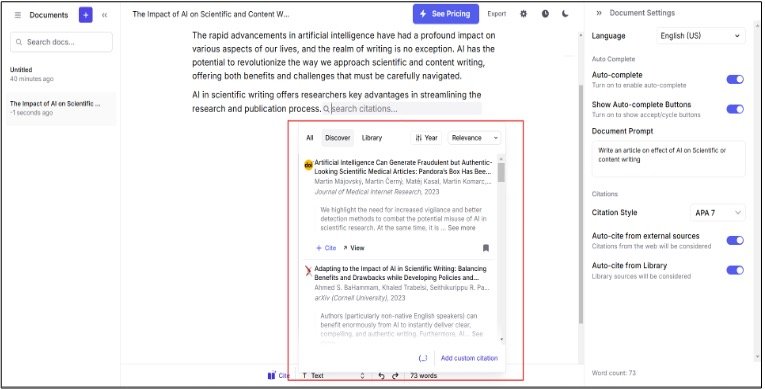
Cite References: You can select any sentence generated from Jenni or written by you and Cite references from the popped-up toolbar or simply press @.
A separate window opens showing different articles relevant to the sentence. Cite references from the external sources in the Discover option or choose a relevant article from your Library.
Jenni will cite the reference and add it to list of references at the end of your document. Free version does not give you the access to list of references. If you need a list of references you will require a paid version for it.
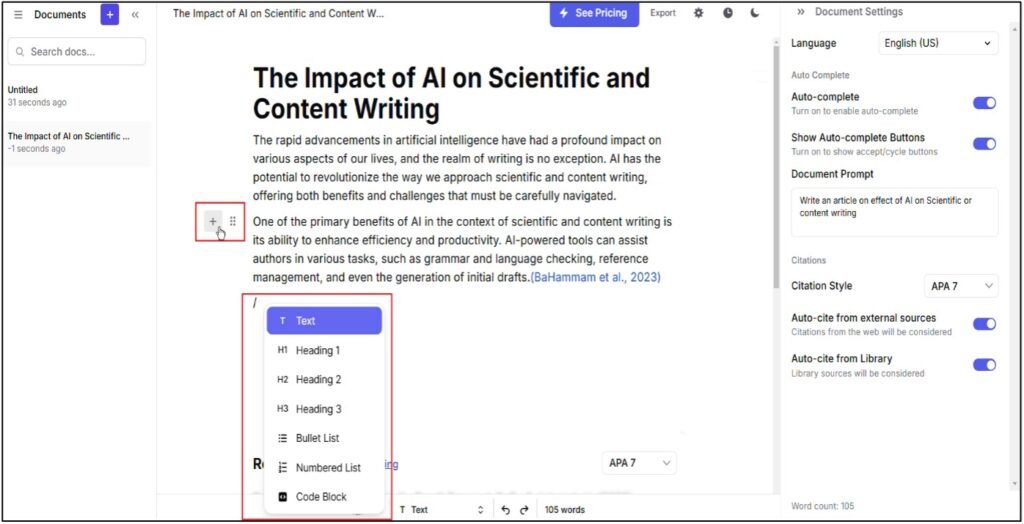
Structure Document: You can also define a New heading or Bullet list or Numbered list for new heading and direct Jenni to write in the instructed manner by clicking on the small + icon present on the left margin your document.
You can structure your document and format similar to a word document.
7. Save or Export
Once your document is complete:
Save it within Jenni AI’s platform or export it as a Word document, PDF, or other supported file formats.
8. Jenni Feature
Jenni AI provide following feature to help you get a good grip on the tool while working
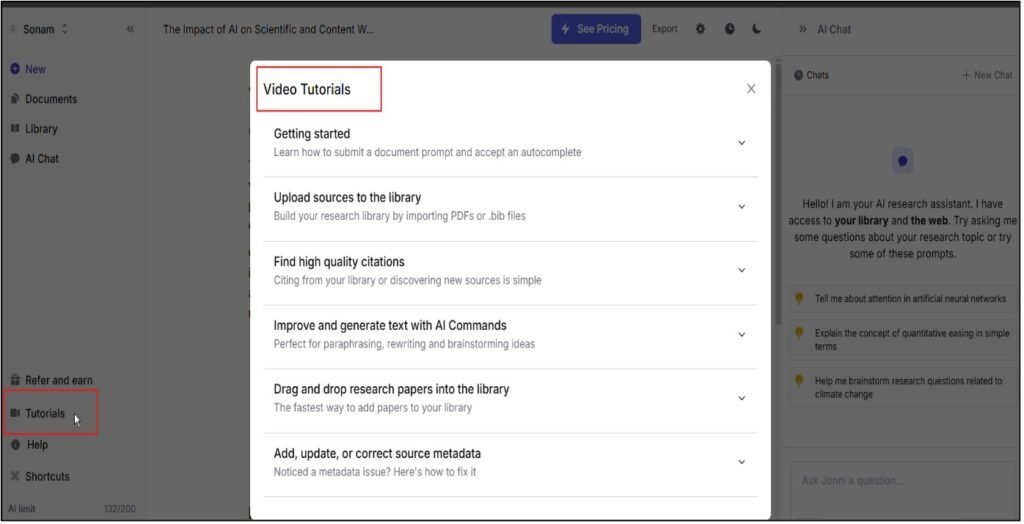
Tutorials: Jenni provides tutorials to help you with the tool. The video tutorial help you guide in writing.
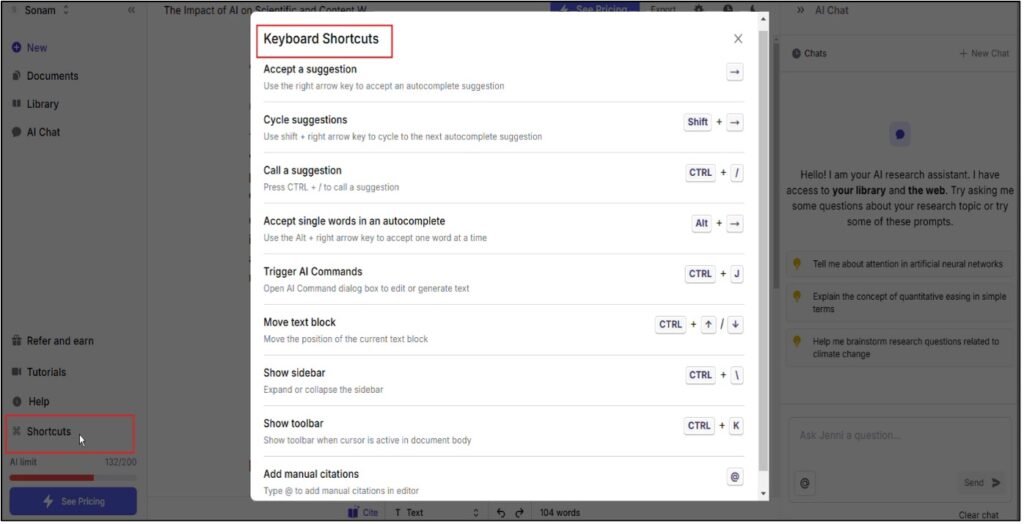
Shortcuts: Shortcuts might help you work quickly without the hassle of looking for options and wasting time while writing.
Additional Tips
Be specific with prompts: The clearer your input, the better the AI’s output.
Iterate frequently: Review suggestions, tweak them, and regenerate content as needed.
Provide feedback: If you don’t like a suggestion, correct it to train the AI’s responses for your style.
Chat with AI: Chat with AI to train it and keep refining your work.
Is Jenni AI worth it?
Yes! For academic writing, Jenni AI is useful for students and researchers looking to improve their writing efficiency.
Is Jenni AI Free to Use?
Jenni AI offers a free version with limited features. This free plan includes: