Are you still struggling to write a research article? Unable to find the correct way to start and collect your thoughts to make a well-structured research article with a uniform tone and maintained flow.
Jenni AI is the right writing assistant AI tool for you.
Follow my Step-by-Step guide to write a research article in just one week.
1. Sign In or Create an Account
Visit the Jenni AI website.
Sign in to your account or create a new one if you don’t already have access.
2. Set up your Document
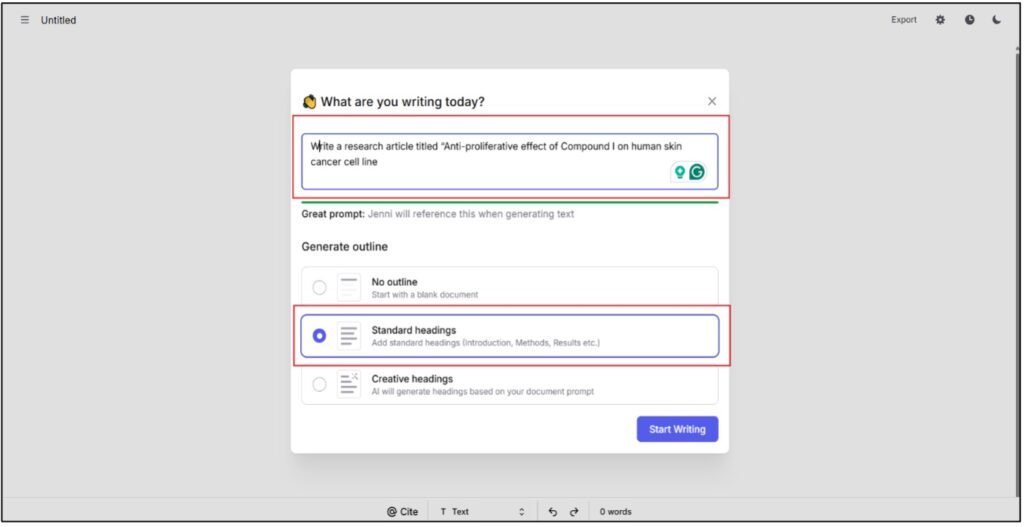
Open a new document and write a strong prompt saying “Write a research article titled “Insert the title of your article” and select the “Standard Heading” option.
For instance, write a research article titled “Anti-proliferative effect of Compound I on human skin cancer cell line”
Jenni AI will follow your command and give you the standard outline of IMRAD for a research article.
You may ask Chat AI to suggest a few titles for your research article and prompt Chat AI “I have this title for my original research article “Anti-proliferative effect of Compound I on human skin cancer cell line”. Suggest a few better titles.
Chat AI will suggest quite a few titles, you can either copy-paste any of them into your document or stick to your original title.
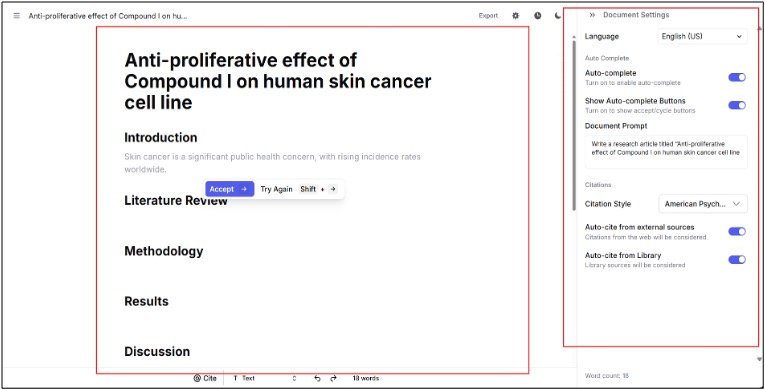
Then, go to the Document Settings option in the tool’s right-hand corner to adjust the content’s tone and other parameters by selecting from the options.
Indicate the citation style as per your need (e.g., APA, MLA, Chicago).
Before generating texts from AI for every section. Set up your Library by uploading the relevant article for writing your original research article. Additionally, make sure you have uploaded all your articles in the correct PDF format.
You can also upload any protocols or results in PDF format for writing your methodology and results section.
4. Generate Content & Iterate for Improvements
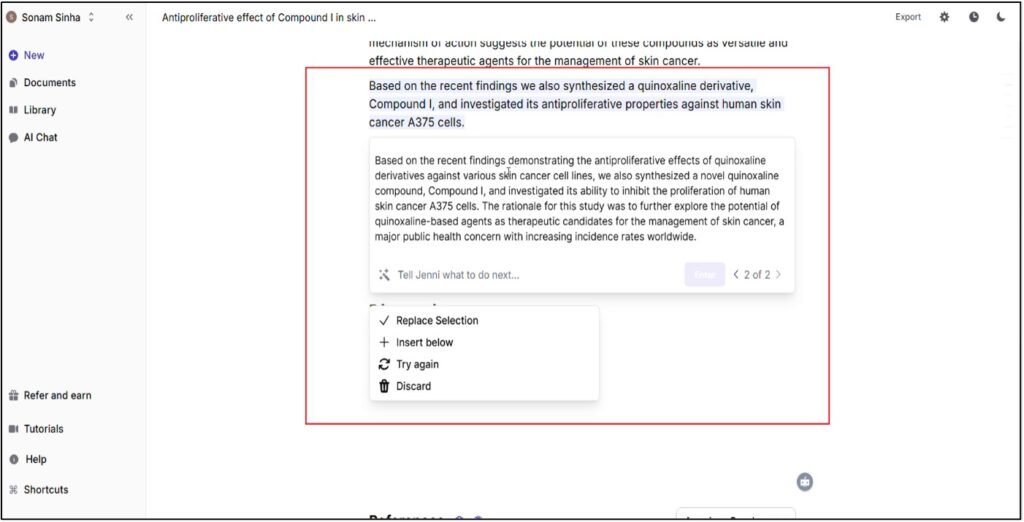
4.1. Introduction:
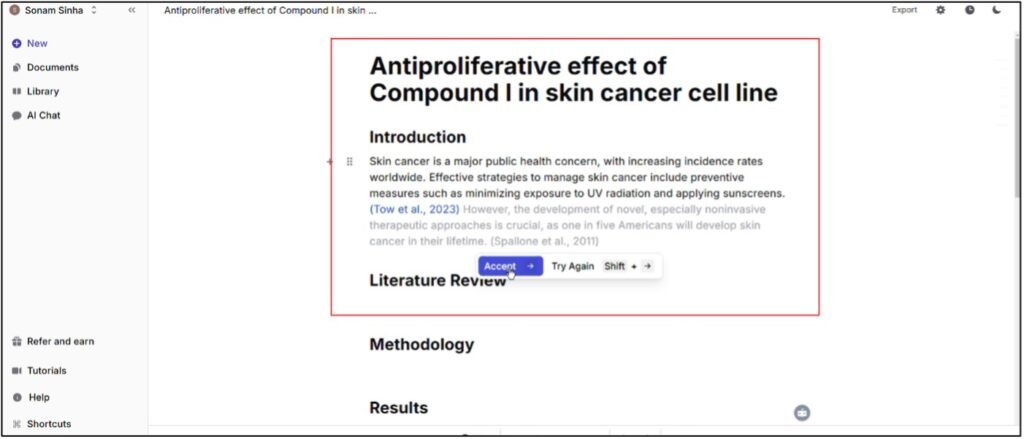
As soon as you place your cursor on the introduction part Jenni will start generating content based on its understanding of the topic and relevance to the introduction section of the article.
You can simply accept the generated text one after the other and guide Jenni AI on what to write in the next lines.
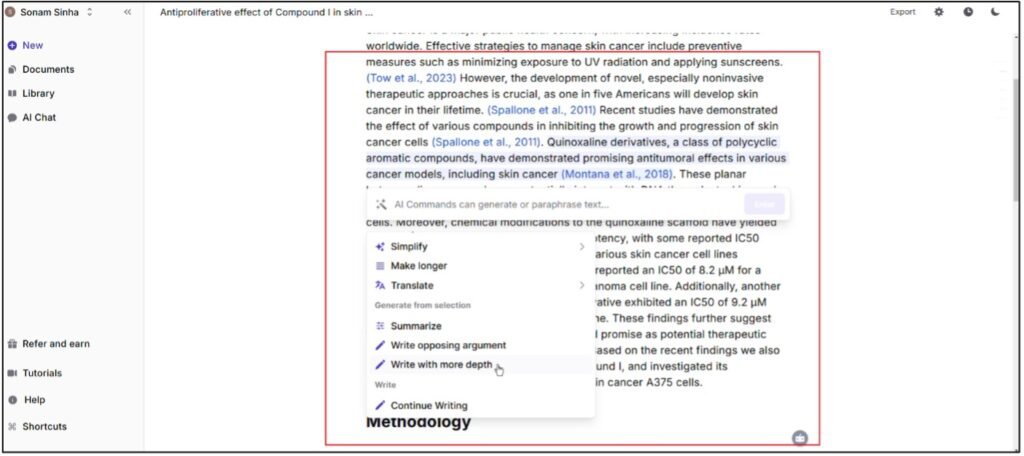
For example, in this case, you will have to guide AI that the compound you have chosen is a Quinoxaline derivative to write about this class of compounds.
You can use AI commands such as “write it in more depth” and “Replace selection” or make several iterations to improve till you are not satisfied with the content. Accept the generated text and complete the introduction section with the end statement.
Write the end statement by yourself as you would know what the purpose of the experiments performed for the research and how it intends to contribute to your relevant field.
Command Jenni to “make it longer” or “elaborate” and finalize the Introduction section.
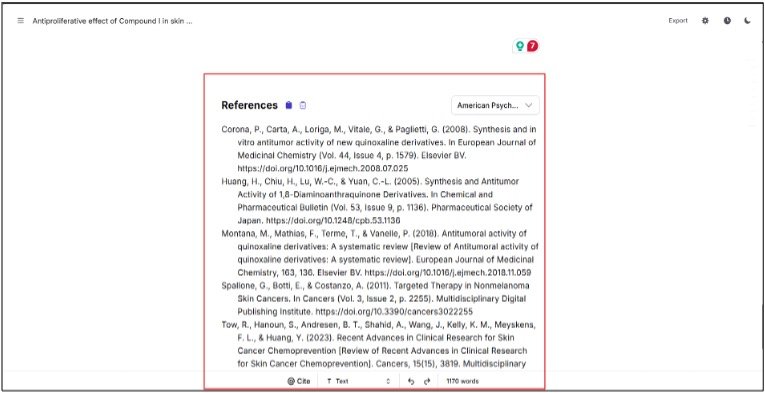
Note: Jenni AI keeps on automatically citing the references and simultaneously doing the bibliography. However, make sure the in-text citations are accurate and referencing is done properly at the end of the article.
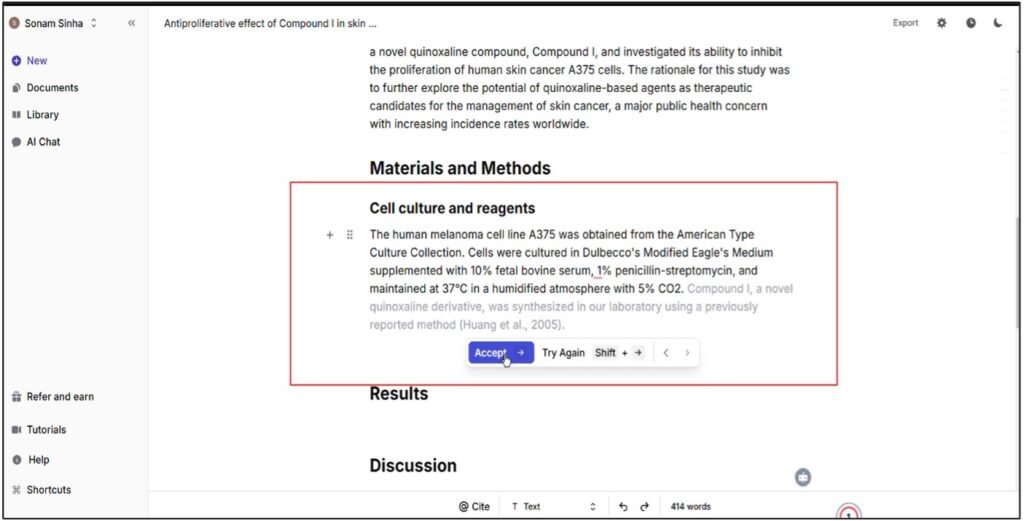
4.2. Material & Methods:
Put your cursor on the Material and Method section and Jenni will start writing the subsections and generate the texts accordingly.
Accept the text if they are in line with your requirements. Guide AI if anything is wrongly stated or is missing.
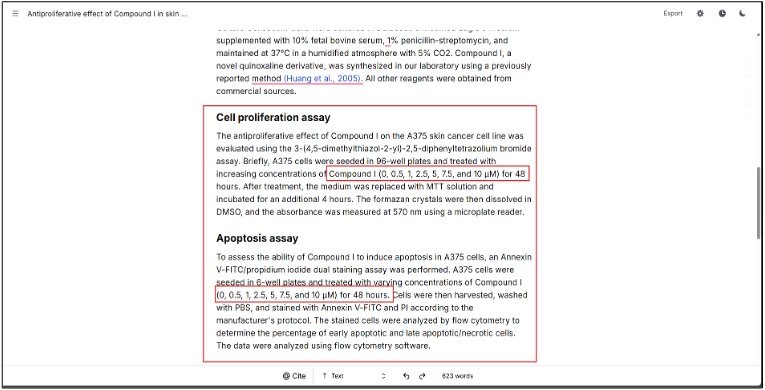
Jenni AI will understand the need of the article and generate relevant experiments that are performed to achieve the mentioned goal in the introduction section. For example, in this case, it is cell culture and reagents, cell proliferation, etc.
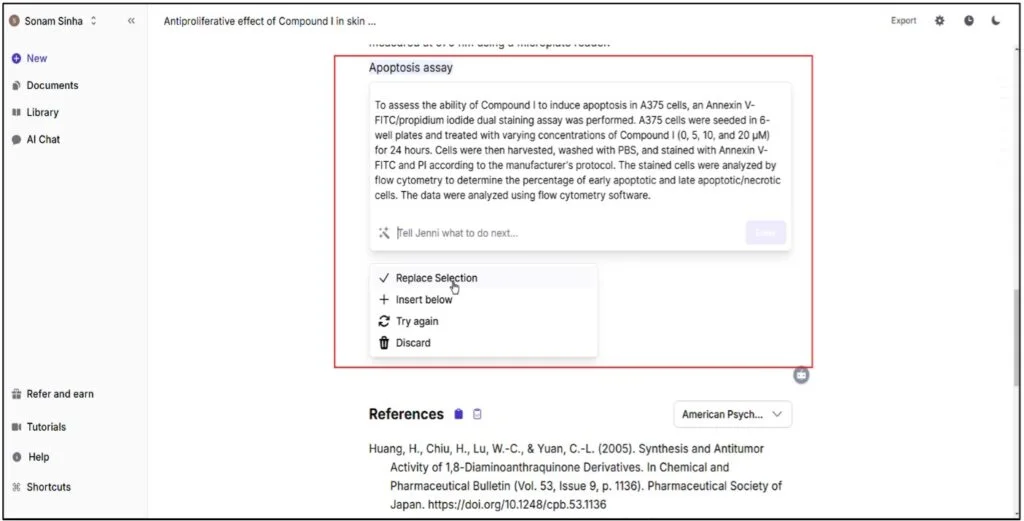
Now for instance, in this article, you have to write about the apoptosis assay so command Jenni “Write about the apoptosis assay performed using compound I in A375 cancer cells”.
Jenni AI will generate the general methodology of the assay referring to the article you uploaded. Correct the dose of the compound, and duration of the assay according to your experimental conditions.
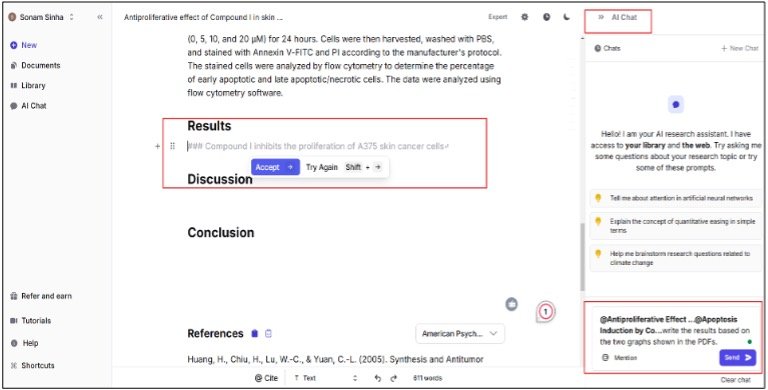
4.3. Results
Head to the result section. Open chat AI and ask it to interpret the results from the uploaded results PDFs in the library. Make sure to incorporate important details such as, in this case, the name of the cell line, dose, and duration of the compound treatment.
Chat AI will interpret the data and write the results. Copy the result to the main document and command Jenni AI to fine-tune the language and maintain the flow if needed.
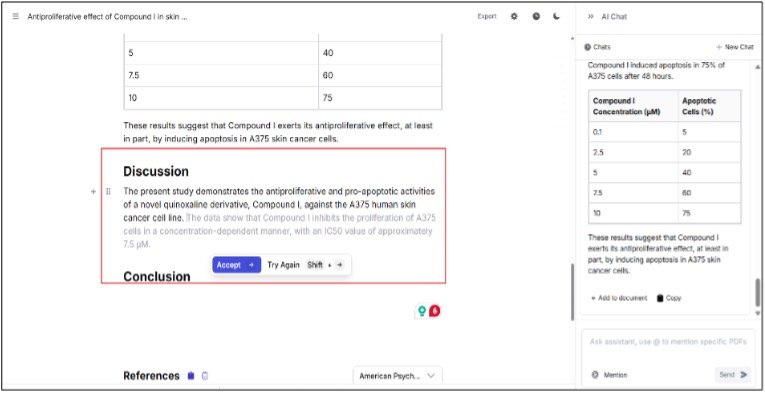
4.4. Discussion
Put your cursor on the discussion section and Jenni will start writing the discussion based on its understanding of the results.
Accept the statement or iterate for improvements using the AI commands as told earlier.
4.5. Conclusion
Jenni will conclude the article as per its understanding
Guide Jenni if you want to add any other perspective as told earlier using AI commands and string prompts.
5. Integrate Citations and References
Use Jenni AI’s citation tools to add citations for the statements and simultaneously provide a bibliography for your references in your chosen style automatically.
Cross-check each reference manually as AI tool can make mistakes.
6. Proofread and Finalize
Review the entire essay for grammar, spelling, and flow.
Ensure the essay adheres to any specific word count or formatting requirements.
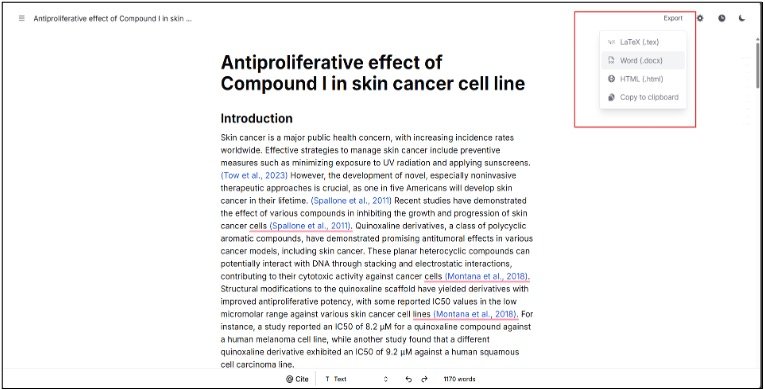
7. Export or Save
Export the document in the format you require (e.g., Word, Latex).
Is Jenni AI Worth It for Research Paper Writing? My Verdict (4.0/5.0)
According to my personal experience of using Jenni AI for writing a research article, I strongly recommend Jenni AI. This writing assistant helps you frame a well-structured article while guiding you and taking guidance from you to improve your writing.
Jenni AI seems to understand your work and maintains uniformity and flow in the making of the article. However, Jenni AI needs a lot of guidance for writing the result section.
You have to be very cautious while providing the details without leaving the tiniest of the details. Additionally, there is no provision for adding images in the article so results part you have to manually insert the images and the graphs which is a little off-putting.